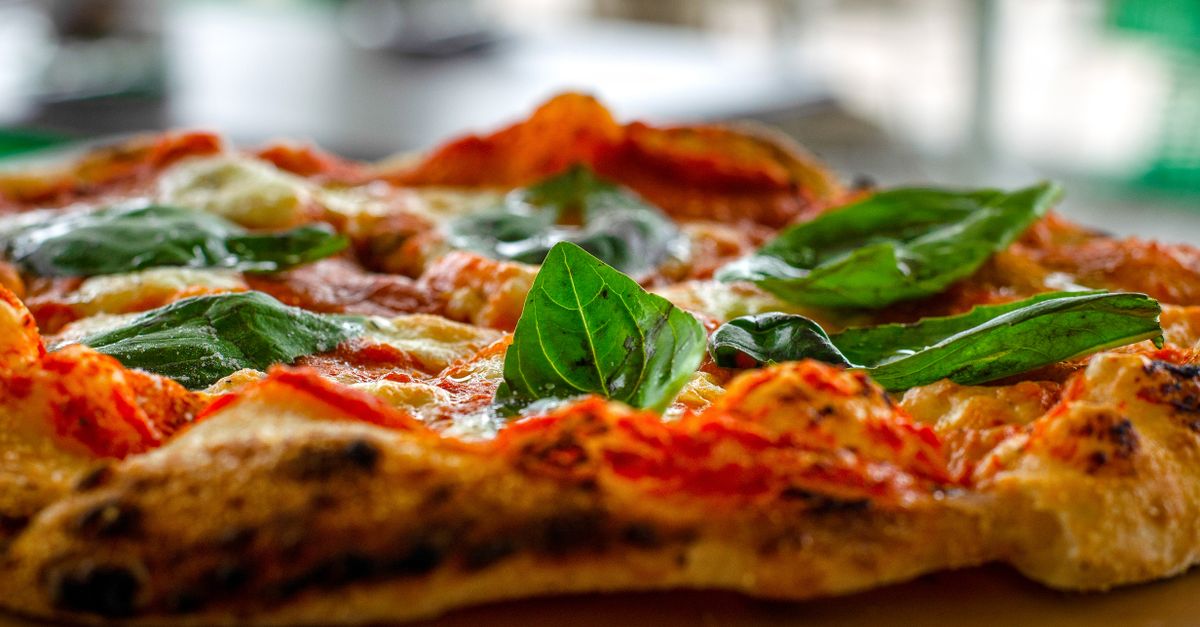
Why Your Homemade Pizza Crust Lacks That Perfect Crisp (And The Pro Secrets That Deliver Pizzeria-Quality Crunch Every Time)
When I first started making pizza at home, I was chasing that elusive dream: a crust with the perfect balance of chewy interior and a satisfying, audible crisp on the outside. What I consistently got, however, was a soft, doughy base that barely held up to toppings. It was edible, sure, but it wasn’t the experience of biting into a truly great pizza. For years, I blamed my oven, my flour, even the humidity. I bought expensive pizza stones, tried different recipes, and still, the crisp eluded me.
What changed everything for me wasn’t a single magic ingredient, but a series of deliberate, often counter-intuitive shifts in my process. The mistake I see most often is focusing solely on the recipe, neglecting the crucial elements of heat transfer, moisture management, and fermentation that define a truly crispy crust. It’s not just about what you put in, but how you treat it.
Key Takeaways
- High initial heat and direct contact with a preheated surface are paramount for rapid crust development and crisping.
- Managing dough hydration and preventing excess moisture from toppings are critical for avoiding a soggy base.
- A longer, cold fermentation period develops deeper flavor and a stronger gluten structure, contributing to better texture.
- Baking your pizza on a pizza steel, rather than a stone, offers superior heat transfer for a professional crisp.
The Truth About Temperature: Your Oven Isn’t Hot Enough (Yet)
Most home ovens, even when set to their maximum temperature (typically 500-550°F or 260-290°C), don’t reach the sustained, intense heat found in a professional pizza oven. Those ovens hit 800-900°F (425-480°C), cooking a pizza in 90 seconds. Our home ovens can’t compete on raw temperature, but we can compensate by optimizing how that heat is transferred to the dough.
The single biggest game-changer for me was investing in a pizza steel. I had a pizza stone for years, and while it was better than nothing, it simply couldn’t hold or transfer heat as efficiently as steel. A pizza stone takes a long time to heat up and loses heat rapidly once the cold dough hits it. A pizza steel, on the other hand, heats up faster, retains heat far better, and transfers it to the dough about 20 times more efficiently than a stone. This rapid transfer creates an immediate ‘oven spring’ and a super-fast browning of the base, locking in that crispness before the moisture can make it soggy.
Actionable Insight: Preheat your pizza steel (or stone, if that’s all you have) for at least one full hour at your oven’s highest temperature. Place it on the top rack, as close to the broiler element as possible. This ensures it’s radiating maximum heat from both above and below when the pizza goes in. For even better results, consider using your broiler for the last 1-2 minutes of cooking. Launch the pizza, let it cook for 4-5 minutes, then switch on the broiler for a final blast of top heat, watching it very closely to avoid burning.
Hydration is a Double-Edged Sword: Mastering Dough Moisture
High-hydration dough (70% water to flour ratio or higher) is fantastic for an airy, open crumb, but it can be your enemy if you’re chasing crispness. More water means more steam, and too much steam in the crust can make it soft. Conversely, a low-hydration dough can be tough and dense. The sweet spot for a reliably crispy home pizza crust, in my experience, is usually between 60-65% hydration.
Beyond the initial dough, topping moisture is a huge culprit for a soggy base. Fresh mozzarella, watery tomatoes, and excessive sauce can release a lot of liquid during baking. I learned this the hard way with juicy, fresh tomatoes that turned my beautiful crust into a floppy mess.
Actionable Insight: Use low-moisture mozzarella, shredded yourself or pre-shredded (though pre-shredded often has anti-caking agents that can inhibit melt). For tomatoes, if using fresh, pat them dry or even roast them lightly beforehand to remove excess water. Spread your sauce thinly – a thick layer simply adds too much moisture. I also lightly brush the edge of my crust with olive oil before baking; this helps it crisp and brown beautifully without drying out the interior.
The Power of Patience: Cold Fermentation for Superior Texture
Many beginner pizza recipes call for a quick 1-2 hour rise. While this works for edible pizza, it utterly fails to develop the complex flavors and, crucially, the gluten structure needed for that perfect chewy-crispy texture. Short fermentation leads to a weaker gluten network that can’t trap gas effectively, resulting in a dense, soft crumb.
What changed my crust from ‘okay’ to ‘wow’ was embracing cold fermentation. This means letting your dough slowly rise in the refrigerator for at least 24, but ideally 48-72 hours. This extended chill time does two magical things:
- Develops Flavor: The slow yeast activity breaks down starches, creating more complex sugars and a richer, more nuanced flavor. This is the secret to that subtle tang in pizzeria dough.
- Strengthens Gluten: The cold slows down fermentation but allows enzymes to work longer, creating a stronger, more extensible gluten network. A strong gluten network is like a trampoline for air pockets, leading to a lighter, airier, and ultimately crispier crust.
Actionable Insight: Plan your pizza night in advance. After your initial mix and a short bench rest (30-60 minutes), divide your dough into individual balls and place them in lightly oiled, airtight containers in the refrigerator. Let them cold ferment for a minimum of 24 hours, but aim for 48-72 hours. On pizza day, pull the dough out at least 2 hours before you plan to bake to allow it to come to room temperature. This makes it much easier to stretch and prevents it from tearing.
Stretching, Not Rolling: Preserving the Airiness
This might seem minor, but it’s a huge factor in the final texture. Rolling your dough with a pin aggressively pushes out all the precious air bubbles that developed during fermentation. These bubbles are what give your crust that desirable open, airy structure when baked, which is intrinsically linked to crispness.
Professional pizzaiolos stretch their dough by hand, using gravity and skilled manipulation to gently expand it without deflating it. This preserves the delicate internal structure, leading to a much better crumb.
Actionable Insight: Always stretch your pizza dough by hand. Lightly flour your work surface and your hands. Start with a room-temperature dough ball, gently pressing from the center outwards, leaving the rim thicker for a good ‘cornicione’ (crust edge). Then, using your knuckles or the backs of your hands, gently stretch and rotate the dough, letting gravity do most of the work. If it feels too stiff, let it rest for 5-10 minutes and try again. Don’t be afraid if it’s not a perfect circle; rustic shapes add character!
The Crucial Launch: Speed and Confidence
This is often the moment of truth where many home pizza makers falter. A slow, hesitant launch from your peel to the hot steel can lead to a misshapen pizza, lost toppings, or worse, a stuck crust that starts cooking unevenly before it’s even fully in the oven.
The goal is a swift, confident slide. Any hesitation allows the moisture from the dough to interact with the peel, creating friction and sticking. A stuck pizza loses its heat, cools the oven surface, and often results in a torn, soggy mess.
Actionable Insight: Prepare your peel properly. Generously dust your pizza peel with a mix of semolina flour and regular flour (about 50/50). Semolina’s coarser texture acts like tiny ball bearings, allowing the dough to slide easily. Once your pizza is topped, give it a little jiggle on the peel to ensure it’s not sticking. If it is, lift the edges and add a bit more flour mixture underneath. Approach your hot pizza steel with confidence, angle the peel, and with a quick, decisive flick of your wrist, slide the pizza off in one smooth motion. Practice makes perfect – don’t get discouraged if your first few launches aren’t flawless.
Post-Bake Cool Down: The Overlooked Crisp Guardian
You’ve done everything right: scorching hot steel, perfectly proofed dough, minimal moisture. Your pizza comes out of the oven, golden and fragrant. The final, often overlooked step to ensure maximum crispness is what you do immediately after baking.
If you cut your pizza immediately on a solid surface, or let it rest on a flat plate or cutting board, the steam rising from the hot crust gets trapped underneath. This trapped steam quickly re-saturates the bottom, turning that hard-won crisp into a soft, chewy disappointment. This is perhaps one of the most common, yet easily rectifiable, mistakes.
Actionable Insight: As soon as your pizza comes out of the oven, transfer it immediately to a wire cooling rack. Let it rest there for at least 2-3 minutes before cutting and serving. This allows air to circulate underneath the crust, carrying away the steam and preserving that delightful crunch. Trust me, this small step makes a monumental difference in maintaining the crispy integrity of your pizza.
Frequently Asked Questions
Q: Can I get a crispy crust without a pizza steel or stone?
A: It’s significantly harder, but not impossible. Use an inverted heavy baking sheet, preheating it for at least 45 minutes at your oven’s highest temperature. The heat transfer won’t be as efficient as steel, but it’s better than a cold pan. Some also use cast iron pans for individual pizzas, preheating them on the stovetop and then transferring to the oven.
Q: My crust is crispy on the bottom but soft on top. What am I doing wrong?
A: This usually indicates insufficient top heat. Ensure your pizza steel/stone is on the highest rack, and consider using your oven’s broiler for the last 1-2 minutes of baking to brown and crisp the top crust and toppings. Watch it very closely to prevent burning.
Q: What’s the best type of flour for a crispy pizza crust?
A: A strong bread flour (around 12-14% protein) is ideal. Its higher protein content helps develop a strong gluten network, which is essential for both chewiness and crispness. All-purpose flour can work, but the results won’t be as robust.
Q: How do I prevent my dough from sticking to the pizza peel?
A: Generously dust your peel with a 50/50 mix of fine semolina flour and regular all-purpose flour. Semolina acts like tiny ball bearings, preventing sticking. Once topped, give the pizza a gentle shake on the peel to ensure it moves freely before launching.
Q: Can I use olive oil on the crust before baking for crispness?
A: Yes, a light brush of olive oil on the exposed crust edge (cornicione) before baking helps promote browning and crisping. Be careful not to use too much, as it can make the crust greasy.
Q: My homemade pizza always gets a soggy middle. How can I fix this?
A: Too much moisture is the main culprit. Use low-moisture mozzarella, apply sauce sparingly, and consider pre-cooking very watery toppings like mushrooms or onions. Also, ensure your pizza steel/stone is fully preheated for maximum initial heat transfer, which helps evaporate moisture quickly from the dough.
Becoming a home pizza master with a truly crispy crust is a journey of understanding the science behind the bake. It’s about respecting the dough, maximizing your oven’s potential, and being mindful of moisture at every stage. Once you dial in these pro secrets, you’ll be consistently turning out pizzas that rival your favorite pizzeria, earning you endless accolades (and delicious meals). Start with embracing the pizza steel and cold fermentation, and taste the difference for yourself.
Written by Mark Jenkins
Practical Skills & Decision-Making
A veteran journalist known for his ability to research thoroughly and present information clearly and concisely.
You Might Also Like
Why Your Homemade Sauces Are Thin and Lackluster (And The Pro Secrets for Rich, Velvety Perfection Every Time)
Transform watery, bland sauces into rich, velvety masterpieces. Discover the pro secrets chefs use for incredible depth and texture.

Why Your Homemade Pizza Crust Lacks That Perfect Chew (And The Simple Pro-Secrets That Deliver Pizzeria-Quality Results)
Stop making bland, cracker-like pizza crusts. Discover the pro secrets to a chewy, flavorful homemade pizza that rivals your favorite pizzeria.
Why Your Homemade Pizza is Bland (And The Flavor Secrets That Changed Everything For Me)
Discover why your homemade pizza lacks flavor and the simple, impactful techniques that deliver pizzeria-quality taste every time.