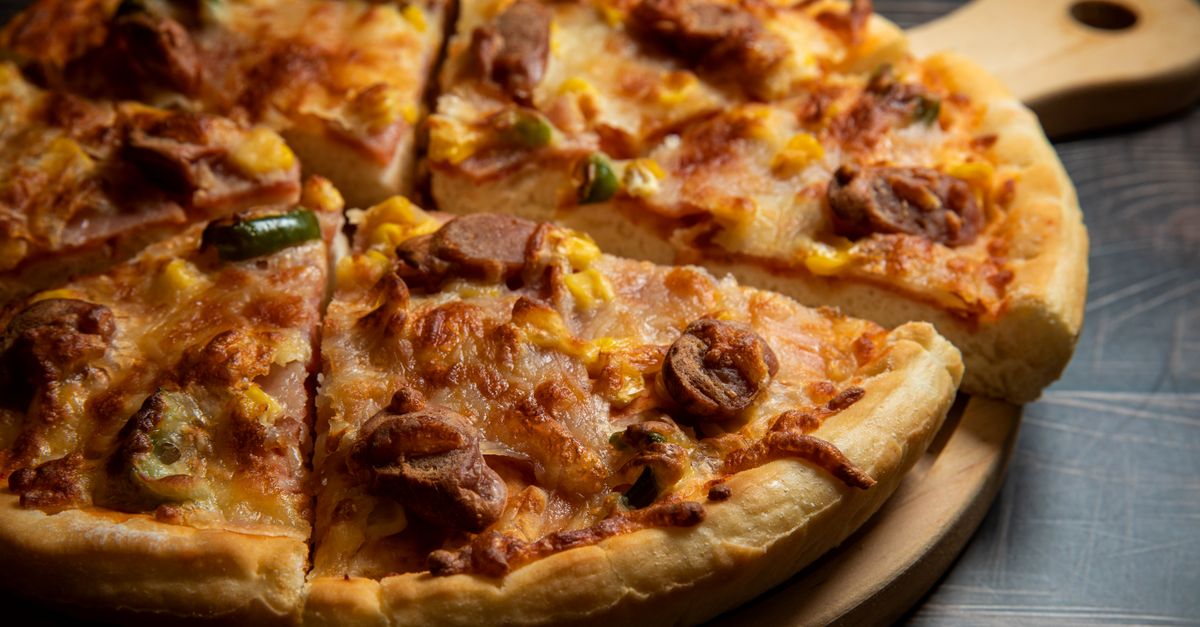
Why Your Homemade Pizza Crust Isn't Crispy (And The Pro Secrets That Deliver Pizzeria-Quality Crunch Every Time)
Are you tired of making homemade pizza with a delicious topping, only to be let down by a soggy, chewy crust that lacks that satisfying crunch? You’ve tried cranking up the oven, even using a pizza stone, but it still doesn’t quite get there. In my experience, most home bakers make a few critical, often overlooked mistakes that sabotage their crust’s crispness. They focus too much on just the dough recipe or the oven temperature, missing the deeper secrets that pizzerias know.
I’ve spent years perfecting my homemade pizza, from bland, soft attempts to a crust so good it rivals my favorite local spot. What changed everything for me wasn’t a magic ingredient, but a systematic approach to moisture management and heat transfer. It’s about understanding the science behind the crunch, and then applying practical, often counter-intuitive techniques.
Key Takeaways
- Proper dough hydration and minimal handling are critical for developing a crisp crust, not just a good flavor.
- Preheat your cooking surface significantly longer than you think, aiming for true, sustained high heat.
- Strategic use of high-absorbency flours or additives can wick away moisture for a superior crunch.
- Never overload your pizza; a balanced topping-to-crust ratio prevents steam buildup and sogginess.
- Understand how residual moisture from fresh ingredients can turn your crust soft and implement countermeasures.
The Overlooked Enemy: Excess Moisture in Your Dough
The biggest culprit behind a non-crispy crust isn’t usually your oven temperature or even your recipe; it’s excess moisture trapped within the dough itself. Most recipes call for a certain hydration level, typically around 60-70%, which is great for a pliable, easy-to-work-with dough. However, too much water, or not properly developing the gluten structure to handle that water, means you’re essentially steaming your crust from the inside out.
In my early days, I’d just follow a recipe and then wonder why my crust was always a bit too soft. The mistake I see most often is bakers not accounting for ambient humidity or using flour that isn’t as absorbent as they think. What changed everything for me was learning to adjust my dough’s hydration by feel, rather than strictly by the numbers. I aim for a dough that is tacky but not sticky, and that passes the ‘windowpane test’—meaning I can stretch a small piece thin enough to see light through it without tearing. This indicates well-developed gluten, which forms a strong matrix to hold gases and creates an airier, crispier crumb. If your dough feels too wet after mixing, don’t be afraid to add a tablespoon or two of extra flour during the initial kneading until it reaches that ideal tacky consistency. This slight reduction in free moisture upfront gives the oven a head start on crisping.
True High Heat: Beyond Just Turning Up the Dial
Everyone knows pizza needs a hot oven, but most people drastically underestimate how long to preheat their pizza stone or steel. A conventional home oven might reach 500°F (260°C) in 15-20 minutes, but your pizza stone will be far from adequately heated. It might feel hot, but it hasn’t absorbed and retained enough thermal energy to transfer that intense, immediate heat that makes a crust spring and crisp rapidly.
The mistake I see most often is people sliding their pizza in just as the oven light indicates it’s at temperature. This is a recipe for a pale, undercooked bottom. What changed everything for me was extending my preheat time to at least 60-90 minutes at the highest possible temperature (usually 500-550°F or 260-290°C). For even better results, consider a pizza steel over a stone; steel conducts heat far more efficiently and retains it better. The goal is to create a super-heated surface that instantly caramelizes the sugars in the dough upon contact, forming that coveted crispy base before the toppings have a chance to steam it into submission. A little trick: use an infrared thermometer to actually measure the surface temperature of your stone or steel; you’ll be surprised how long it takes to hit consistent readings of 500°F+.
The Secret Ingredient: High-Absorbency Flours and Additives
While good quality all-purpose or bread flour is fine, some pizzerias use specific flour blends or small additives to enhance crispness. This isn’t about radically changing your recipe, but making subtle, impactful shifts. For example, using a small percentage of semolina flour in your dough or as a dusting agent can significantly improve crispness. Semolina’s coarser texture and higher protein content contribute to a firmer bite and absorbs surface moisture, preventing sogginess.
Another trick I learned is the strategic use of cornmeal or rice flour as a dusting agent on your pizza peel. Many people use flour, but these alternatives create a non-stick barrier that helps the pizza slide, and crucially, they don’t add more gluten or moisture-retaining starch to the crust. They instead act as tiny ball bearings that also slightly wick away surface moisture from the dough’s underside, promoting crispness. In my experience, even adding just 1-2 tablespoons of finely ground cornmeal to a standard 500g flour dough can make a noticeable difference in the final texture, providing a grittier, crispier exterior without altering the flavor profile dramatically.
The Topping Conundrum: Less is Often More
One of the most common pitfalls for home pizza makers is overloading the pizza with too many toppings. While it might seem like you’re getting more value, a heavy hand with sauce, cheese, and other ingredients creates several problems for crust crispness.
Firstly, excessive moisture from toppings can steam the crust, preventing it from drying out and crisping. Think about juicy tomatoes, fresh mozzarella, or even certain vegetables—they all release water when heated. Secondly, too many toppings create a thermal barrier, insulating the dough from the radiant heat of the oven, particularly from above. What changed everything for me was adopting a more minimalist approach, especially for home ovens which don’t have the intense, rapid-cooking power of a commercial pizza oven. Aim for a balanced ratio: enough sauce to coat, a moderate layer of cheese, and sparse, flavorful toppings. If you love fresh ingredients like basil or cherry tomatoes, consider adding them after the pizza has cooked for a few minutes, or even just before serving. This prevents them from releasing too much moisture and keeps their vibrant flavors intact. For high-moisture vegetables like mushrooms, pre-sautéing them to remove excess water before adding them to your pizza is a game-changer.
Counteracting Moisture from Fresh Ingredients
Even with a perfectly hydrated dough and a super-hot oven, fresh, watery toppings can still introduce enough moisture to sabotage your crisp crust. This is where a little proactive planning makes a huge difference. Think about the common culprits:
- Fresh Mozzarella: While delicious, it’s packed with water. Instead of slicing it right onto the pizza, try tearing it into smaller pieces and letting it drain on paper towels for 15-30 minutes beforehand. Some pros even press it gently to squeeze out excess liquid.
- Vegetables: Mushrooms, spinach, onions, and bell peppers all release significant water when cooked. For mushrooms and spinach, a quick sauté in a hot pan to evaporate moisture is essential. For onions and peppers, you can roast them lightly or just use them sparingly. What I learned is that the difference between a great pizza and a soggy one often comes down to these small, extra prep steps. If you love the fresh, juicy burst of tomatoes, consider using sun-dried tomatoes (packed in oil, drained well) for concentrated flavor with less moisture, or add fresh cherry tomato halves only in the last few minutes of baking. These seemingly minor adjustments ensure that the moisture doesn’t create a steaming effect on your beautifully developing crust.
Beyond the Oven: The Post-Bake Ritual
The work doesn’t end when the pizza comes out of the oven. How you handle it immediately afterward can also impact crispness. Ever noticed how a pizza delivered in a cardboard box can get soft? That’s steam getting trapped. When your pizza comes out, it’s still very hot and releasing steam.
The mistake I see often is people slicing the pizza on a flat cutting board immediately, trapping the steam beneath the slices. What changed everything for me was letting the pizza rest on a wire cooling rack for 2-3 minutes before slicing. This allows air to circulate underneath the crust, letting any remaining steam escape and preventing the bottom from becoming soggy. It might seem like a small detail, but it’s crucial for maintaining that hard-earned crispness. After resting, slice it quickly and serve. Every second counts when it comes to preserving that perfect crunch.
Frequently Asked Questions
Q1: Can I get a crispy crust in a regular home oven without a pizza stone or steel?
A1: It’s more challenging but possible. Instead of a stone/steel, preheat a heavy-duty baking sheet or an inverted cast-iron skillet for at least 30-45 minutes. Place the pizza directly onto this preheated hot surface. You’ll still want your oven at its highest temperature and to ensure your dough isn’t too wet.
Q2: What’s the ideal dough hydration for a crispy crust?
A2: For a home oven, aim for a hydration level between 58% and 62%. This range provides enough pliability for handling while minimizing excess water that can lead to a soggy crust. Adjust slightly based on your specific flour’s absorbency and ambient humidity.
Q3: Should I blind bake my pizza crust for extra crispness?
A3: While blind baking can help, it’s generally unnecessary for a crispy pizza crust if you follow the tips above (proper hydration, super-hot cooking surface, and moisture control of toppings). Blind baking can sometimes lead to a tougher crust, and it adds an extra step.
Q4: My crust gets crispy on the edges but still soggy in the middle. What gives?
A4: This is often due to a combination of factors: an overloaded middle section, insufficient preheating of your cooking surface, or uneven heat distribution in your oven. Try reducing toppings in the center, extending preheat time, and rotating your pizza halfway through baking if your oven has hot spots.
Q5: Does the type of cheese affect crispness?
A5: Absolutely. High-moisture cheeses like fresh mozzarella can release a lot of water. For maximum crispness, a low-moisture, whole-milk mozzarella is often preferred. Using a blend, or draining fresh mozzarella thoroughly, can also help. Harder cheeses like Parmesan contribute flavor without adding significant moisture.
Written by Mark Jenkins
Practical Skills & Decision-Making
A veteran journalist known for his ability to research thoroughly and present information clearly and concisely.
You Might Also Like
Why Your Homemade Sauces Are Thin and Lackluster (And The Pro Secrets for Rich, Velvety Perfection Every Time)
Transform watery, bland sauces into rich, velvety masterpieces. Discover the pro secrets chefs use for incredible depth and texture.

Why Your Homemade Pizza Crust Lacks That Perfect Chew (And The Simple Pro-Secrets That Deliver Pizzeria-Quality Results)
Stop making bland, cracker-like pizza crusts. Discover the pro secrets to a chewy, flavorful homemade pizza that rivals your favorite pizzeria.
Why Your Homemade Pizza is Bland (And The Flavor Secrets That Changed Everything For Me)
Discover why your homemade pizza lacks flavor and the simple, impactful techniques that deliver pizzeria-quality taste every time.